- Home
- Brooder basics
- Small DIY brooder
How to make a small chick brooder box.
So you have six to eight baby chickens who need a house? Here's a simple, inexpensive idea for a DIY chicken brooder tote.
In this article we'll look at ideas for a simple, small brooder for chicks which you can make relatively inexpensively and contains everything your baby chickens need in their first couple of weeks post-hatch.
And best of all, you'll be able to use it year after year, no matter how often you have new chicks!
As with most things chicken-related, you need to plan in advance. Have it ready and warm before your chicks arrive.
Not sure what a chicken brooder is or what size you need?
Before you plan your own chicken brooder designs, make sure you know what a brooder needs to do, how long chicks need it, what size you should aim for depending on the number of chicks you have, and where to place it to make sure your baby chicks are safe.
All that information is contained in this article: basics of the chicken brooder box.
There's more information about when it's safe to move chicks from an incubator to the brooder, here.
This is a long page containing a lot of information. These are the different sections; click on any of them to go straight there, or if you want to read everything just scroll as usual.

Choosing a chick brooder box: what size?
It's important to plan for a chicken brooder which is large enough to contain the number and size of chicks you have.
If this is your first time with chicks you'll probably be surprised at how quickly they grow. Below are two of my Wyandotte chicks, one aged one day, the other one week. The week old already has quite well developed wing feathers.
That's how fast they grow!
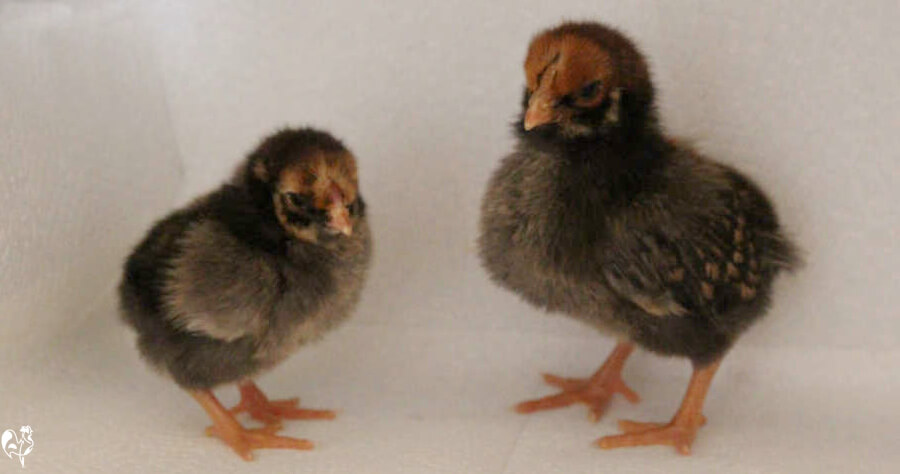 Wyandottes, one day vs one week old.
In terms of somewhere for your chicks to live, you have two choices depending on how many chicks you have:
- use a small brooder box (such as a tote box) initially, knowing that you'll need to exchange it for a larger one within two or three weeks at most
or...
- use a large container which will suit them from the time they leave the incubator until they're ready to go out with the big girls.
As a "rule of thumb", if you're hatching (or buying) six or seven chicks (eight at a push), use a "tote" storage box to begin with and move to a large box at around week 2 or 3. The kind of outside storage box you might use for garden furniture is one such possibility.
If there are more than eight, don't use a tote box – there will just not be enough room. Start with a larger container which, ideally, can expand as the chicks grow.
Over the years I've discovered that by far the best option for more than eight chicks is a puppy pen brooder, which can start small and grow with them.

If you purchase a product through links on the rest of this page, I receive a small commission at no extra cost to you. I only recommend products I have purchased or would purchase myself and which I believe would benefit you. To learn more please see my disclosure policy.
Tote boxes as DIY chicken brooders: do they work?
They work very well for a small number of chicks, providing they are set up properly. Use them from the point of hatch for two to three weeks.
Make sure you choose a tote with reasonably high sides. Those chicks will begin to use their wings within those first weeks!
Choose a transparent box if possible. Chicks are curious, and love to spend time watching the outside world from the safety of their brooder box!
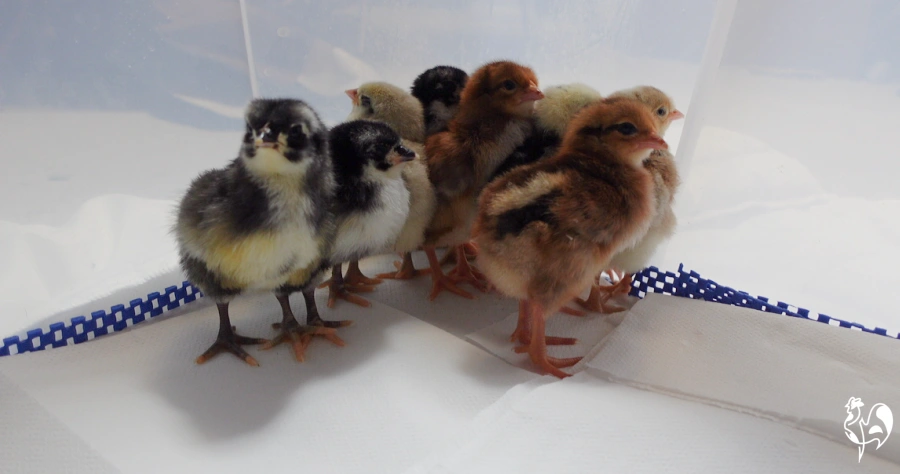 Some of my day old chicks watching the world go by from the safety of their brooder box!
DIY tote box brooders: benefits.
- Inexpensive, easily available and long-lasting: it's possible to buy "specialised" brooders, but they're generally smaller, not as easy to plan specifically for your situation and number of chicks, and a lot more expensive.
- Easy to customise: plan your preferred bedding, the location of feeders and waterers, and the positioning of the heat source.
- The solid sides means it's free from draughts which is critical for new chicks.
- Very easily cleaned: smooth sides mean there are no nooks and crannies for disease or mites to lurk.
- Doubles as a storage container: use it to store incubating and hatching equipment when it's finished as a brooder. Buying a tote with a lid means it will prevent some very expensive incubating equipment from spilling out and breaking.
DIY tote box brooders: drawbacks.
- Size: chicks will outgrow it within two or three weeks, depending on the size of the box and the size and number of chicks.
- Ventilation: if it's placed in a very hot or humid room without much air movement, you may need to drill some holes in the side to allow airflow from an external fan. Make sure the holes are above the height of the chicks' heads – they need ventilation, not chill.
- Slippy surface: plastic is too slippy for baby chicks. It must have non-slip bedding until their legs are strong enough. See this section for more information.
- Heat: plastic isn't a good distributor of heat, so it's critical to use a chicken brooder heater plate – not a heat lamp – in a plastic brooder. See below for details.

Brooder bedding for baby chicks in the first few days.
For a detailed article about which bedding is best to use for baby chicks, including specific research evidence, please see this page about bedding in the brooder.
Important: Whatever else you decide to use as your starter bedding, don't use newspaper. It's much, much too slippy and your chicks won't be able to stand properly. Their tiny legs need something to grip with when they're little.
If they don't have that, there's a real danger they'll develop splayed leg. Splayed leg is usually easily dealt with, but it's far better to prevent it in the first place.
On the bottom of your chicken brooder tote, lay non-slip matting. This is critical to help baby chicks remain upright at the point where their legs are weak and vulnerable to injury.
I use inexpensive shelf liner bought from a supermarket – it's much less expensive than buying from a pet store and does exactly the same job. It's the same liner that I have in my incubator at the point of hatch.
For the first few days the best bedding to have on top of the liner is plain kitchen paper roll. Buying a large roll from a supermarket will last for several clutches of chicks.
Simply line the base of the tote box with the paper on top of the liner.
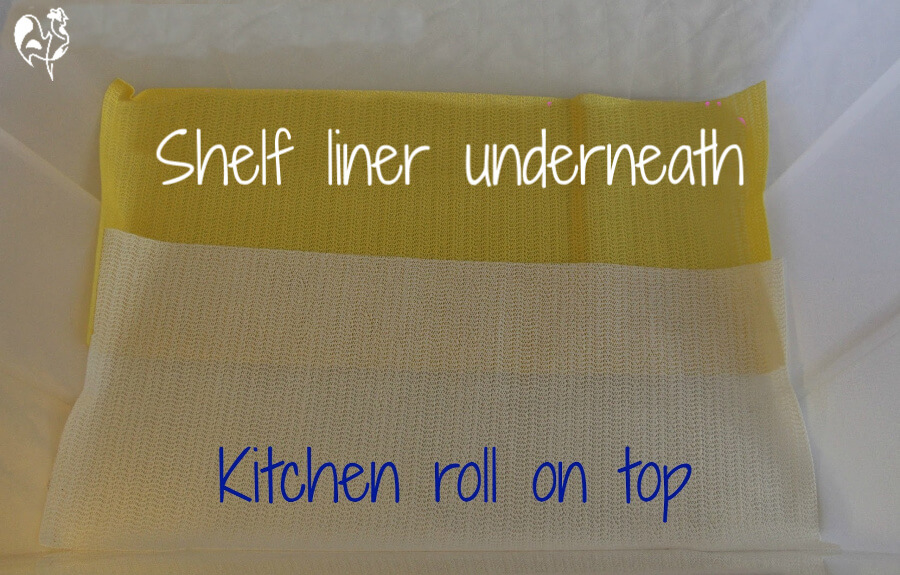 The base of my tote storage box brooder.
Using white kitchen paper enables even the tiniest babies to discover food. The sight and, in particular, the noise of sprinkling a little chick feed onto the paper will encourage them to investigate.
Pecking it will inevitably tell their taste buds "this is good" – they then come to recognise what food is.
It's exactly what a mother hen would do in the farmyard.
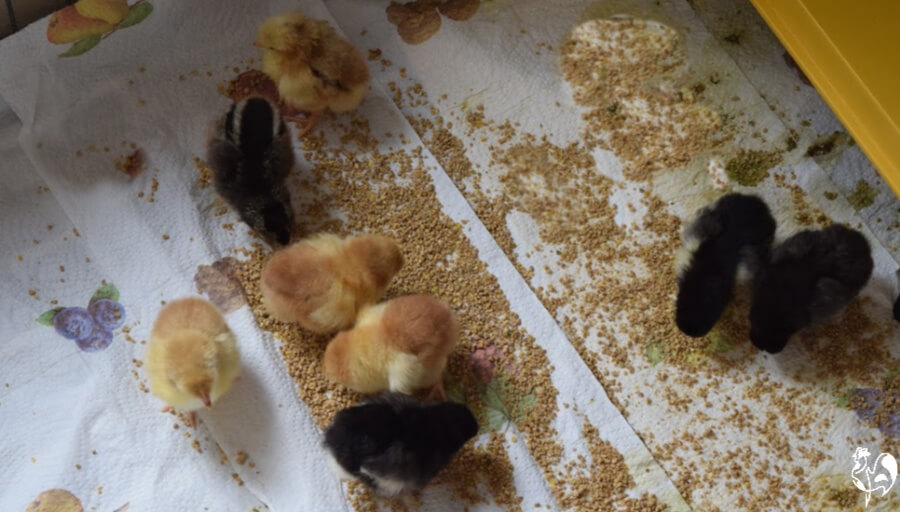 Chicks will find their food very easily if it's sprinkled on kitchen paper.
You'll discover that chicks can poop very well from a very young age, so obviously the paper will need changing at least twice a day. That last thing you want is for the paper to become wet and messy with poop – a sure way for your young flock to develop illnesses.
Once they're used to their food, it's time to move them on to different bedding. I usually change after three to four days, but that's a matter for you and your assessment of your own circumstances.

Sand as bedding in the DIY chick brooder.
Sand as bedding in a small brooder has a lot going for it. It absorbs moisture well, it's easy to keep free from poop (scoop with something like a cat-litter scooper), it can be put on the compost heap, it's great for even tinies to dust-bathe in, it's a good source of grit once they begin eating things other than basic starter feed, and it retains heat well.
But the retention of heat is also a potential problem. If you use a regular (rather than a radiant) heat lamp it will heat the sand. And sand will not just retain heat, it will keep getting hotter.
Think about when you've been on a beach on a hot day. Remember how the sand can burn your feet? Now, think about how much more vulnerable your chicks' feet are.
So by all means use sand but be aware of its increased temperature under a heat lamp.
My baby chicks in their tote brooder box, using sand to dust-bathe!

Keeping chicks warm in the brooder.
Baby chicks aren't able to regulate their own temperature – they need to be fully feathered which won't happen for several weeks. In the meantime, it's our responsibility to make sure the level of warmth in the brooder is adequate to meet their needs.
My detailed article about the ideal chicken brooder temperature reviews the warmth chicks need week by week.
Installing a chicken brooder heater.
Into our chick brooder box we need to add a heat source.
Think very carefully before using a standard heat lamp. The danger of fire is real, and using them with a plastic brooder box means that there will be some spots which become too hot and others, too cold.
Instead, consider using a radiant heat lamp (also called a chicken brooder heating plate). For a tote box brooder and up to eight chicks, a small heater such as my Brinsea brooder lamp is enough.
Set it on top of the bedding sheets, at one end of the tote box.
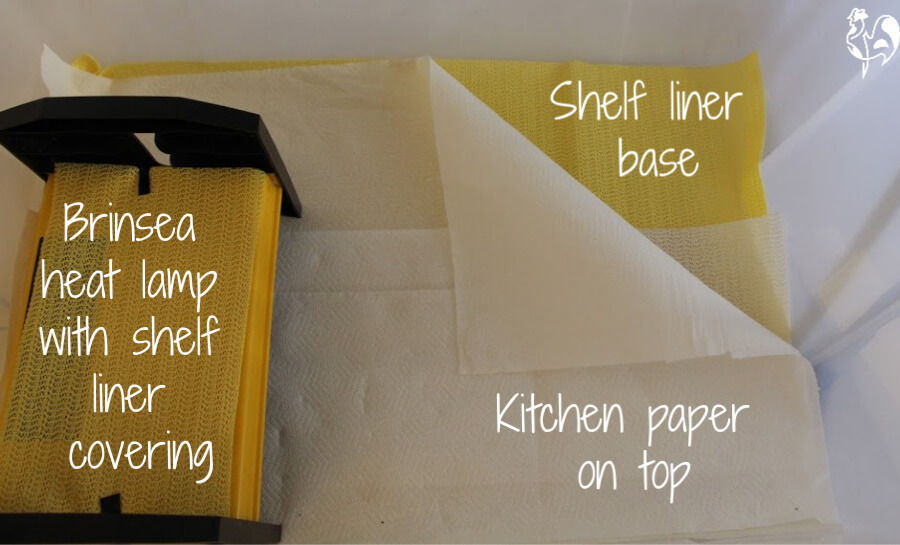 My small tote brooder box with base liner and heat lamp added.
Click to read my review of how Brinsea brooder heaters work and why they're best for chicks in the brooder.
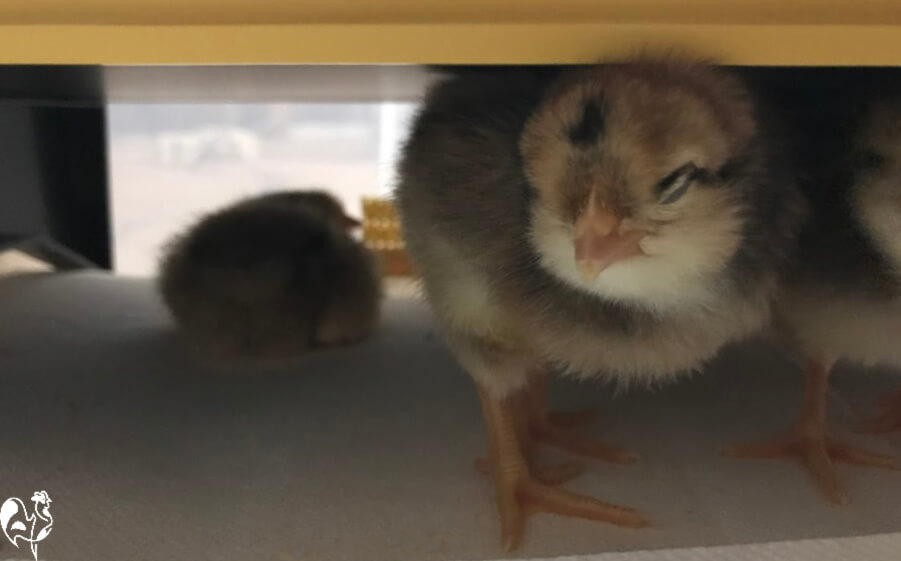 One of my day old chicks under the Brinsea radiant heat lamp.
Food and drink.
Finally, we need to provide baby chicks with the appropriate food and drink which will carry them through the first few weeks of life.
The growing chick has nutritional needs which change as they get older. For detailed information about what that means, take a look at this article which covers what baby chicks eat.
As important as the feed itself is the type of feeder most likely to keep food in and poop and bedding out. Over the years I've learned what works well for the brooder, and what will cost the most, in terms of losing feed.
Check this detailed article about the best chick feeders and waterers in the brooder.

That's your first DIY chicken brooder in place!
Your chicks now have everything they need to begin a happy, healthy life in your small chick brooder box. Congratulations!
Don't forget, though, that as they grow, their needs will grow with them. Use the links to the articles below for more information.

Want more information about the care of new chicks?

Sources.
The information I provide in this article and others is based not just on my own experience, but on evidenced facts from scientific, peer-reviewed research and books.
Some of the trusted sources I have used in this article are these.
1. Fairchild, B. D.: Environmental Factors to Control when Brooding Chicks. Pub. University of Georgia, Faculty of Poultry Science.
2. May, J. D., and B. D. Lott, 2001. Relating weight gain and feed: gain of male and female broilers to rearing temperature. Pub. Journal of Poultry Science, 2001.
3. Carlile, F. S.: Ammonia in poultry houses: a literature review. Pub. World's Poultry Science Journal, 1984.
4. Damerow, Gail: Hatching & Brooding Your Own Chicks. Pub. Storey, 2013.
- Home
- Brooder basics
- Small DIY brooder
