- Home
- Incubators
- Mini Advance
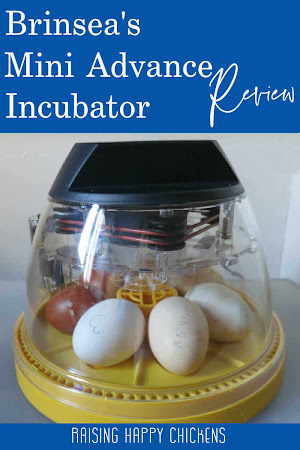
Brinsea's small chicken incubator – the 'Mini II Advance'.
Bottom line: ideal for home or school hatching.
One of the best ways to take some of the understandable stress out of incubating chicken eggs is to have a reliable incubator.
Brinsea's small Mini II Advance chicken incubator is exactly that. It comes as close as any machine can to behaving like a mother hen.
And it's easy to set up and use in the process.
I have two of these machines. The first is still working after nearly ten years' use, the second after seven (because, as you'll discover, one incubator is never enough!).
This little incubator is my preferred model of them all, despite the fact that I have others which are larger, have more features and are more expensive.
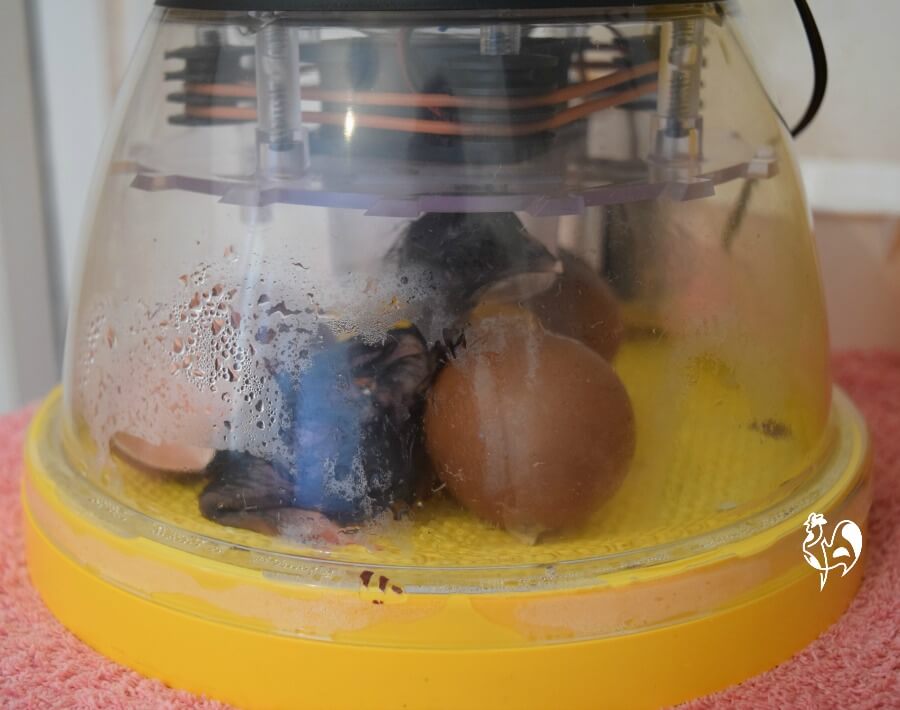
The best feature of all, its huge dome, allows you to get as close to your hatching chicks as it's possible to be. You'll have a grandstand view!
That makes it particularly good for schools, and for parents or grandparents encouraging children to follow the magical process of watching a chick hatching from an egg.
If you're incubating chicks at home or at school, you're satisfied with hatching up to seven eggs, and you want something that takes a lot of the stress out of hatching, this is the incubator I would strongly advise you to use.
Here's what you'll find on this page. Click on any of these links if you have questions about a specific area. For my detailed review, read the article in full.
The Brinsea Mini II Advance chicken incubator: here's the bottom line.
Links on the rest of this page are "affiliate links". If you click on them and buy, I earn a small commission at no cost to you. I only recommend products I know and love and which I think will be genuinely useful to you. See my disclosure policy for more information.
- This small chicken incubator is made of a very robust plastic. That's ideal if you have young children. I've dropped mine a couple of times and it's still intact and working just as well as when it first came out of the box ten years ago.
- The internal fan means the eggs are maintained at an ideal temperature. In other less efficient incubators, eggs can be warm at one end and cooler at the other. Hatch rates are considerably improved by an even temperature.
- Its large, clear dome makes it a great viewing chamber. So it's possible to watch every minute of your chicks hatching without losing any of the drama and without having to raise the lid at critical times. For this, it's actually much better than some of Brinsea's larger and more expensive incubators.
- It's very compact, so sits easily on a desk or small table.
- It is easy to set up, and the digital settings do most of the work for you, controlling temperature and turning times.
- This model does not have an humidity pump. To control humidity, you have to remember to top up the water chamber every couple of days.
- The updated model has a way of topping up water for humidity from an external reservoir without lifting the lid. This is a definite bonus from my earlier model, which required me to lift the lid, even during lockdown. It was far from ideal and it's a tribute to Brinsea that they took note of feedback and altered the design.
- Importantly, this incubator automatically turns the eggs which is a critical part of incubation. No more worrying about how often you've turned – or whether you remembered to do it at all!
- Critically, it also automatically stops turning the eggs at the point of lockdown.
Please note: the links here and on all the images are to the most recent version of the Mini Advance. It's the same as my model but with the improved external water top-up feature and a more colourful top!
Not sure which incubator you need? Find a comparison of 9 different Brinsea incubators here.

Who's this incubator a good fit for?
- Anyone new to hatching. This little chicken incubator makes it easy and virtually fool-proof.
- Anyone who's hatched before and wants a reliable machine for just a few eggs at a time.
- It's ideal if you're a family with kids and want to hatch your own chicks (as long as you've thought through all the post-hatch issues first).
- Teachers working on hatching projects with pupils. Of course, the same applies about being sure you are able to deal with post-hatch homing of the results. You are likely to hatch at least one or two males.

Setting the chicken eggs in the incubator.
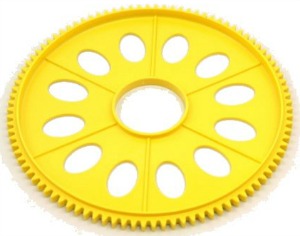
- This incubator is not only for chicken eggs. Although it comes with one disc which holds up to seven large chicken eggs, a disc holding 12 smaller bantam, quail or pheasant eggs can be bought separately.
- Whichever eggs you're hatching, the blunt end of the egg should face the outside.
- Using the external top-up point, fill one half of the water pot in the centre of the incubator with lukewarm water up to the top of the divider. Make sure to place the top guard back on it.
- Keep it topped up to this level until day 18, which shows on the display as day 2. At that point the level should come right up to the top of the water container on both sides.
- Set the digital display (see the video below) for the appropriate temperature, number of days, turning times and cooling periods.

How the Brinsea Mini incubator works.
- The egg ring turns automatically at the required intervals and pulls the eggs with it. It's a simple but very effective way of doing what a mother hen would be doing: making sure the eggs turn so the yolk and embryo don't stick to the shell.
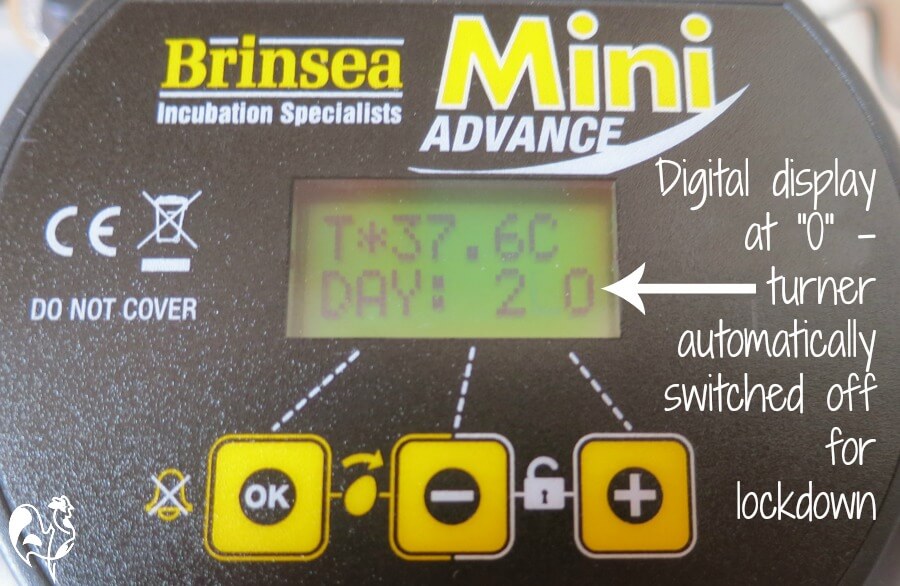
- The Brinsea counts the days down from 21 to 0. At day 2, which is three days before hatch and the beginning of the "lockdown" period, the incubator will stop turning and the display shows '0' to reflect that.
- Make sure you put the top ring back on the internal water pot at day 2. It's there to stop newly hatched chicks toppling in and drowning.
- You also need to replace the egg ring with a non-slip mat at lockdown. Brinsea supply on card mat. I use plascitised shelf liner which is ideal for stopping newly hatched chicks from slipping.
- The chicks should start to 'pip' (that is to break through the shell and start to hatch) at day 0. If they don't, don't panic! This is not an exact science and chicks come when they're ready. I've had chicks hatch as late as three days after that.
- Now sit back and wait for your chicks to do the hard work!

Setting the Brinsea Mini II Advance digital display: a video.
Because some people told me they were intimidated by Brinsea's chicken incubator digital display, I've made a short video which takes you through the steps one by one and shows you how easy it is.
Grab a cup of your favourite beverage and enjoy!

Any drawbacks?
- It's not cheap, but in my view it's worth every penny for its reliability and the amount of stress it relieves. Beware of cheap imitations!
- This incubator does not read the humidity levels, so it's impossible to tell as incubation goes on whether the percentage is right or not.
- Having said that, keeping the water container topped up as recommended in Brinsea's instructions has always worked perfectly for my hatches.
- The turning mechanism becomes quite wet because of the necessary high humidity as the chickens hatch.
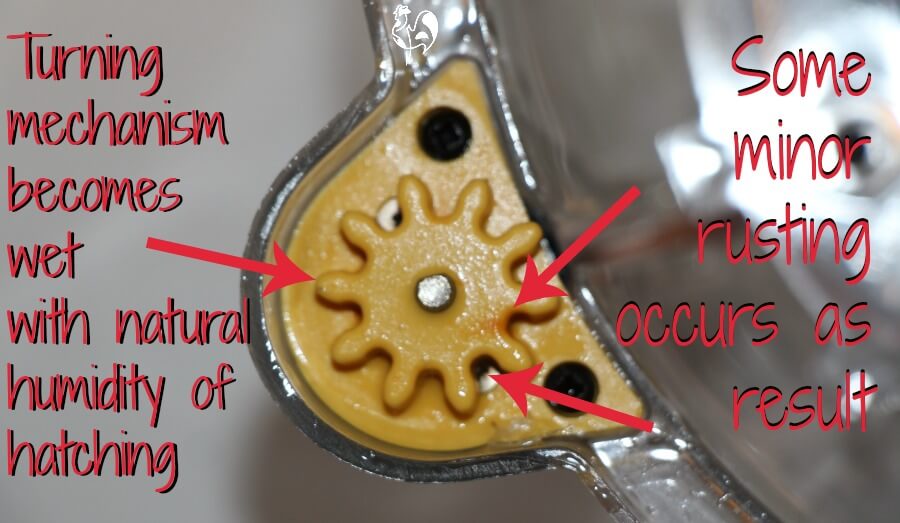
- This can make the screws which hold it in place rusty but it doesn't seem to affect the mechanism at all. It certainly hasn't with mine, and I've not read any negative comments about it.
- Some people find it a bit noisy. I often keep mine in my office and have no difficulty working with it. In fact quite the reverse: when I turn it off, I miss its soft humming noise!
- This incubator is designed to hatch standard chicken eggs. It will also incubate smaller eggs (bantams and quail for example) with the small egg tray that comes with it (see above), but it will not be able to cope with larger poultry such as goose, duck or turkey.

The Mini Advance's five greatest advantages are...
In case you can't tell, I love this chicken incubator. Here are my five "personal best" reasons why.
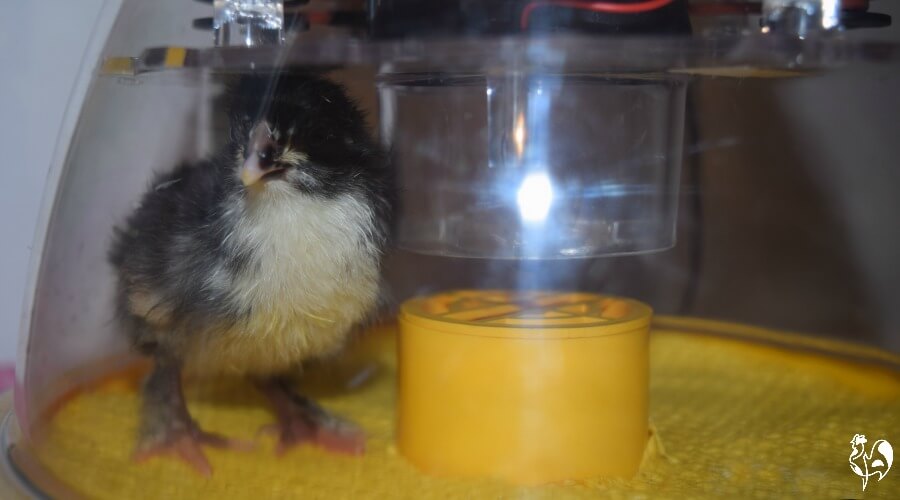
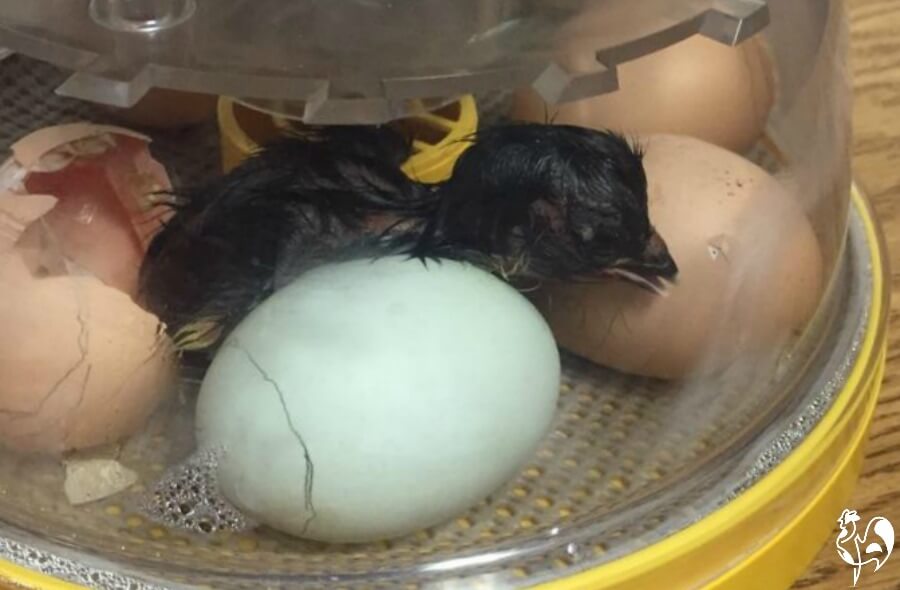
- Top of the list: the "up close and personal" view! This is one of my Speckled Sussex chicks who has just hatched and, as you can see, you can get as close as it's possible to be without actually climbing into the incubator!
- So it's excellent for kids in particular (of all ages!). Watching a chick hatch is the most magical experience.
2. It's so easy to set up. The digital display can be a bit confusing at first, but follow the steps in my video (above) and you'll be fine.
3. It automatically turns the eggs as often as I want it to, so I don't have to remember.
4. It keeps humidity at the right level without the need for complicated equipment. And the new model allows this to be done without raising the lid, which is critically important after lockdown.
5. It cools the eggs for part of each day, just as a hen would do were she incubating.

Conclusion and "Golden Egg" award.
If you've seen any of my other product reviews, you'll know that I award golden eggs, rating from one (I wouldn't touch this item even if it were free!) to five (I love this item and highly recommend it).
For the Brinsea Mini II Advance chicken incubator, I award it no less than...

A Fabulous Five Golden Eggs!
Why 5?
Although it has not got the humidity pump control of the more recent Mini II EX, it's a lot less expensive if you want to hatch just a few eggs each year. And being able to top up the humidity pot in the incubator without lifting the lid is a major design improvement on the earlier versions.
And although the Mini Eco is even less expensive, the Mini Advance has the all-important turning mechanism which takes the pressure off needing to turn the eggs every few hours.
So it's mid-range, mid-price and the incubator I would choose again and again if I wanted to hatch a small-ish number of eggs. No contest!

Other Brinsea incubators now available.
A less expensive option.
If the Mini Advance cost is just too much, there is a less expensive version of this incubator which doesn't have the automatic turning mechanism. You need to turn each egg by hand, several times a day. Otherwise, it's exactly the same machine.
My advice is, if it's at all within your financial grasp, to go with the Mini Advance. Consistent turning is critical to a successful hatch and it's all too easy to forget.
However, if it's just not an option financially, have a look instead at Brinsea's 'Mini Eco' incubator.
A more expensive option.
There's an upgraded model of the Mini Advance: the Mini II Ex. It includes an automatic humidity control. However, it's a lot more expensive and it doesn't have the automatic day countdown function of the Mini Advance.
Click here to see the Brinsea Mini II Ex chicken incubator.
An updated, larger option: the Brinsea Maxi 24 / Maxi 24 Ex.
This is Brinsea's newest range of incubators for those who want the same kind of deal as the Mini, but to hatch more than seven eggs.
The Maxi incubates up to 24 medium sized or 12 large breed eggs, and works in exactly the same way as the Mini Advance.
Take a look at the Maxi chicken egg incubator here.
This incubator does not have an exrternal humidity pump – for that you'll need to pay more, for the Maxi 24 EX.
I now have the Maxi EX incubator and will be reviewing it as soon as I have used it.
In the meantime, take a look at the Maxi II EX, here.
Wishing You Happy Hatching!

Here are some other pages about incubating and hatching chicken eggs.
- Home
- Incubators
- Mini Advance
