- Home
- Incubation day by day
- Lockdown (day 18)
Chicken egg incubator lockdown.
What it is, why it's critical, how to do it in 5 simple steps.
If you're incubating chicken eggs you'll probably have heard the words "incubator lockdown". But what exactly is it, and what needs to be done to make our hatch successful?
Firstly: What does "chicken egg incubator lockdown" mean?
"Lockdown" in this context is simply the word used to describe the time when an egg incubator has its settings optimised, ready for hatch.
The eggs are not turned or candled again and the incubator is left with its lid closed until after the chicks have hatched.
 Pin Me!
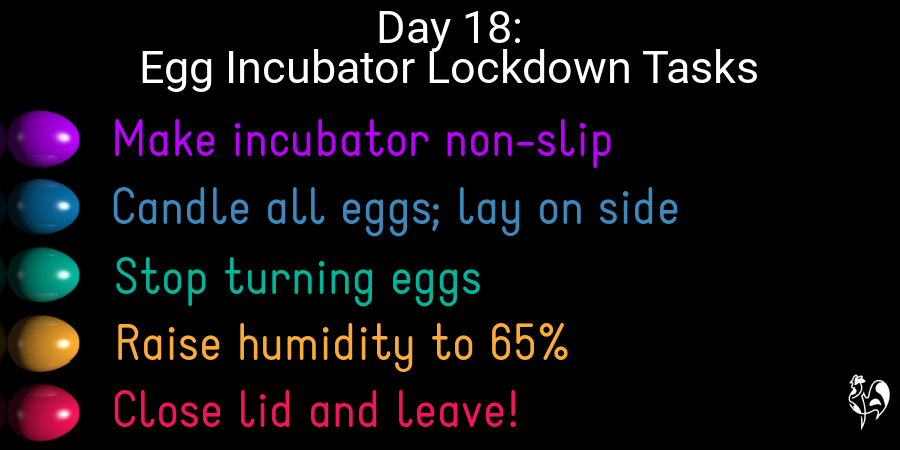
It requires five main things to be done.
When should chicken egg incubator lockdown take place?
The optimum time is three days before the eggs are due to hatch. For large sized chicken eggs this is at Day 18 of incubation.
Bantam eggs tend to hatch earlier, at around 19 days into incubation, so they should be locked down at day 16.
If you have one incubator holding both large and bantam chicken eggs and you don’t have a way of separating them, lock down all the eggs at Day 16.
5 simple steps to locking down your egg incubator.
There are just five easy things to be done on day 18 to make sure any chicken egg incubator is properly locked down and has the best possible chance of healthy chicks hatching.
Please note: I’m using my original Brinsea Mini Advance and Octagon 20 (now discontinued but still available on eBay) incubators as examples in these instructions, but exactly the same principles apply
whichever incubator you’re using.
5 critical steps to chicken egg incubator lockdown.
If you want to jump to a particular section, use these links. However, all the steps are critically important for a successful hatch, so if you're unsure of anything please do not skip!
Chicken egg incubator lockdown: a video.
Would you rather watch a video? No problem!
The video doesn't have as much detail as the written text, but if you prefer to gather information by watching it may be helpful as a starting point.
Links on the rest of this page are "affiliate links". If you click on them and buy, I earn a small commission at no cost to you. I only recommend products I know and love and which I think will be genuinely useful to you. See my disclosure policy for more information.
Chicken egg incubator lockdown, step 1: stop chicks from slipping.
You need to prepare a non-slip surface in the incubator for the baby chicks when they hatch.
Why?
Chicks
will start to move around immediately. They stumble around the incubator, into and over other eggs, into and over
each other.
A slippery surface can cause their weak legs to
do the 'splits', resulting in a condition known as 'splayed leg'. In some cases it can even result in a completely dislocated leg.
A dislocated leg would mean the chick has to be culled. Splayed leg can be fixed, but it’s better to prevent it from happening in the first place – and saves the chick from a potentially very painful injury.
Some companies, including Brinsea, now include a non-slip base with their incubators.
If not, choose a non-slippery surface like this one. It's a plasticised material usually used for shelf lining. This is the one I use ('antiscivolo' meaning anti-slip – for those who don't know, I live in Italy!).
It's worth buying a large roll if you intend to incubate more than once.
How to make an anti-slip base for lockdown.
- Take your eggs out of the incubator and put them somewhere safe. They’ll be fine for a few minutes. I use a towel or blanket on my incubation table to cushion them.
- Now remove the turning plate or egg tray. In the case of this incubator it's the yellow disc with the holes where the eggs have been.
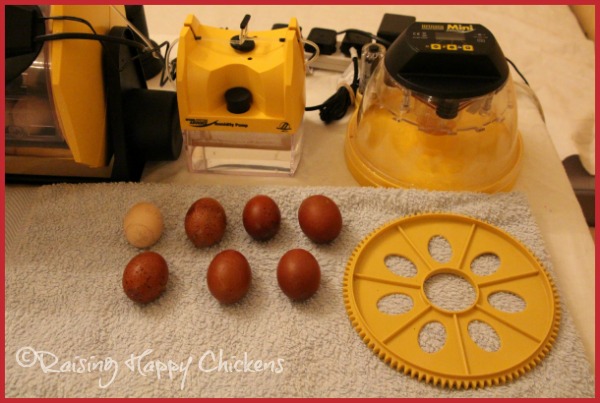
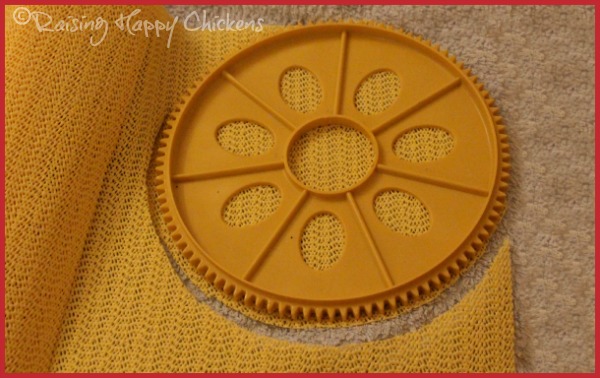
Put the disc or egg tray on top of the plastic and draw around its circumference with a pen.
Now cut out to the shape of the tray, making it slightly smaller than the tray itself.
For Brinsea's small incubators, fold the material into quarters and cut out a hole in the middle to allow for the water pot.
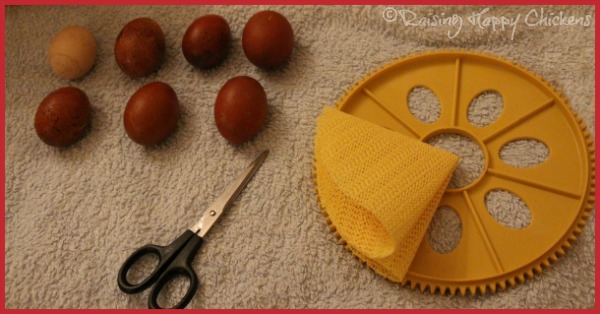
That’s it! You should now have a chick-slip-proof mat to keep your chicks safe when they hatch.

I make exactly the same type of base for chicks hatching in any of my other incubators.
Hatching can be a messy process, so once all the eggs have hatched, discard this base and make a fresh one next time you incubate.
Chicken egg incubator lockdown step 2: egg candling at day 18.
- If you haven't yet got a candler, look at this page where I review the best candling devices available.
- Here's detailed "how to" information if you're not sure about the process of egg candling.
- Before you put your eggs back into the incubator, candle all of them in turn.
- Eggs which have shown no signs of development should be removed at this point. This is an example of an egg which is clearly not going to develop.
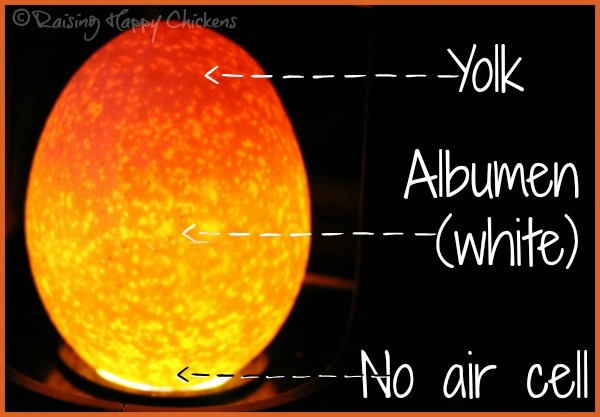
- Eggs with cracks, particularly if they also have an oozing liquid on the shell, should also be discarded. These eggs have stopped developing. If left, they will explode, scattering bacteria over the rest of the batch.
- Eggs with a "blood ring" should also be thrown away.
A blood ring is a sign that the embryo has died and the blood, which in a healthy hatching egg is spread by a complex system of veins, has collected in one place.
This is an example of what to look for in this type of egg.
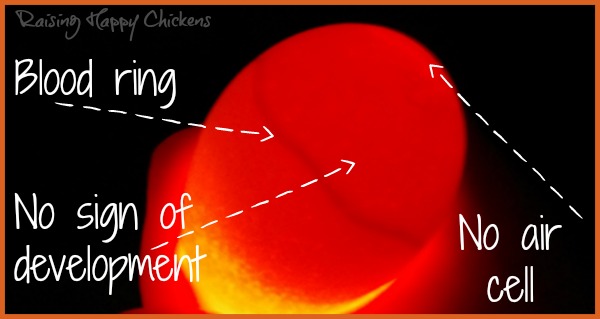
For more information, including an explainer video looking at a blood ring and what's inside the egg, see this page.
While you're candling, mark the air cell.
You will hopefully have been doing this throughout incubation as you
candle your eggs, but it’s important especially to do it at lockdown (day 18, or day 16 for bantam eggs).
Why?
The air cell is where the chick should begin to break through the shell. It won’t
be exact, because it will continue to grow over the next three
days before hatching. But it gives a reasonable indication of where to look.
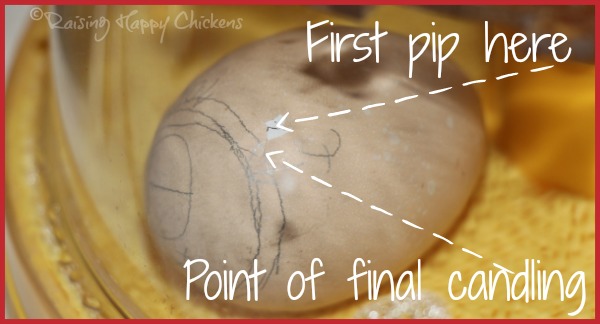
Once you've discarded non developing eggs and marked air cells in the rest ...
- Eggs which are showing 'normal' development for Day 18 (most of the egg is dark, with a growing air cell) can now be put back into the incubator.
- Do not place the turning disc back into the incubator. The eggs should be placed flat on their side, lying on your non-slip base.
- For incubators like the Octagon 20, which holds eggs standing on end during incubation, this is the time to lay them flat.
- I can generally fit around 20 - 22 standard sized chicken eggs in this way – though it does get very crowded once they start to hatch!
- Before you close the lid, the incubator should look something like this, with the non-slip base at the bottom, all eggs candled, lying flat on the base.
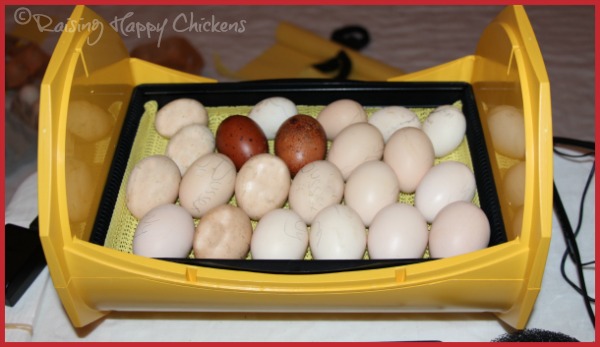 My Octagon 20 incubator at lockdown.
Egg incubator lockdown step 3: stop turning the eggs.
The chicks now need to be left alone in order to get themselves into the right position for hatching.
So you should stop turning the eggs now.
If
you’re using an automatic incubator such as the Mini Advance, it will automatically know
when this should happen and will stop turning for you. All you need to
do is remove the turning disc and substitute your plastic flooring.
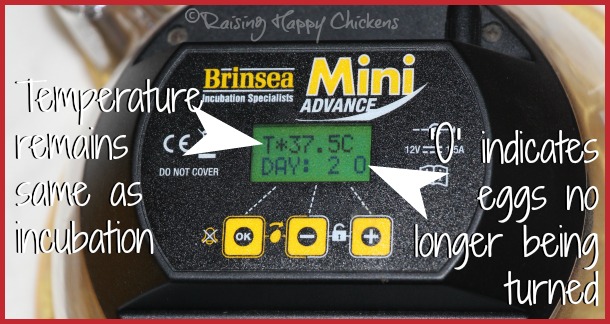
If you have an incubator which uses any other method, such as a turning cradle, simply lift the incubator off the cradle and place it on a flat surface. Unplug the cradle, clean it and put it away for next time.
In an incubator which has an automatic turner but doesn't count the days, such as the Brinsea Maxi 2 Advance EX, re-set the digital indicator to not turn.
- This is absolutely critical. Moving the eggs from now on will mean the chick doesn't position herself properly for hatch, and may lead to her either dying in the egg, or trying to hatch and becoming stuck.
Step 4: increase the humidity for hatching chicken eggs at lockdown.
The humidity level in the incubator for hatch needs to be raised.
For the earlier days of incubation we've held the humidity level at 45%. We now need to raise it to 65%.
Why?
Because the membrane which surrounds the chick must be kept moist enough for
the chick to be able to peck through. If it’s too dry, the chick will
get stuck and won’t be able to hatch. Too wet and the chick will drown.
If you are using an incubator which has an automatic humidity pump, the percentage should be increased now, until the digital readout reaches 65%.
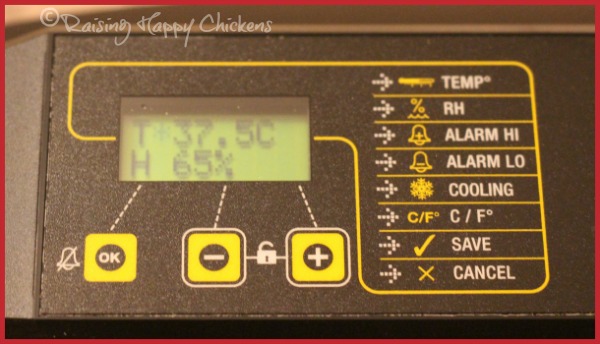
If your incubator doesn't have a humidity pump or a readout, you'll need to rely on the manufacturer’s instructions, or buy a reliable hygrometer.
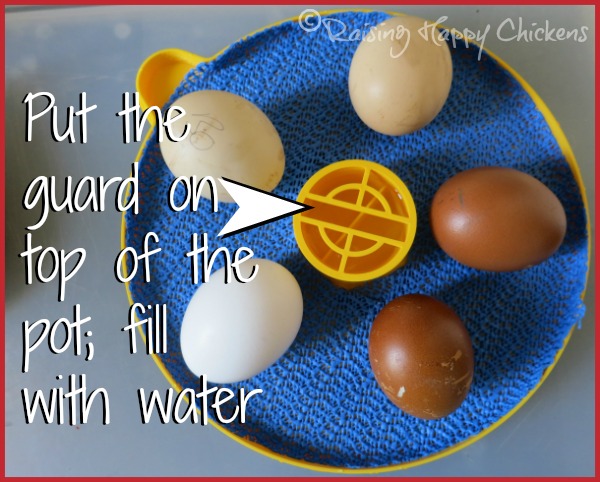
In the case of the Mini Advance (or any of Brinsea’s small incubators) both chambers of the water pot in the centre of the incubator should be filled at lockdown, and kept filled right through hatching.
Make sure you put the guard on the top of the pot as shown below. Newly hatched chicks stumbling round the incubator can easily fall into it. Baby chicks can drown in very little water.
Incubator temperature for the last 3 days of incubation.
The temperature of the chicken incubator from day 18 should remain exactly as it has been for the entire time: 37.5ºC, 99.5ºF.
Remember: it will drop when you open the incubator, so avoid doing that unless absolutely necessary.
Managing ventilation at lockdown.
- Once chicks get to this advanced stage they need a much higher supply of oxygen than they have before now. Poor ventilation can lead to chicks dying, even at this late stage.
- Make sure, whichever incubator you’re using, that it’s standing in a place with a good supply of air. Don't keep it shut in a cupboard, for example.
- Smaller incubators with a fan, like the Mini Advance, will take care of ventilation for you so there’s no need to worry.
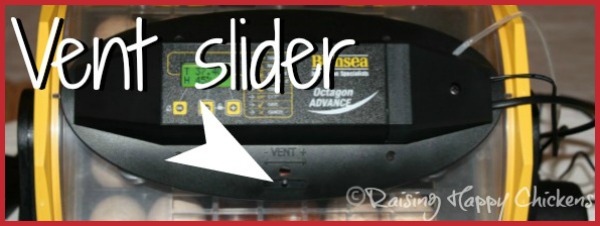
- If you’re using an incubator with an air vent (the Octagon 20, for example), open it to at least halfway at lockdown.
- Before chicks begin to hatch, you may need to increase moisture levels to keep humidity at the right point. Wet kitchen towel will quickly increase humidity when necessary.
- Simply scrunch a piece of kitchen paper and dampen it with warm water. Not cold, because that will reduce the incubator's temperature.
- Put it into the incubator until the humidity has increased, then remove it. Leaving it in will cause the humidity level to increase too much.
Chicken egg incubator lockdown step 5: close the lid and leave it alone!
From now until hatching, your incubator lid should be opened as little as possible and the eggs should not be moved, touched or candled again.
It’s important that humidity levels are maintained inside the incubator throughout lockdown and hatch so that the chick does not get "shrink-wrapped". This happens when the membrane dries out and literally shrinks around the chick. The chick can’t move and so can’t hatch.
Opening the lid will drop humidity levels massively, which is why it needs to be avoided as much as possible from now on.
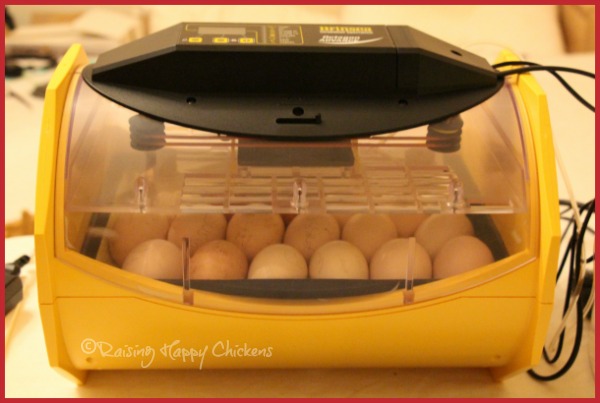
If your incubator has an air vent , it will help to control humidity without disturbing the eggs.
- To increase humidity, close the vent to the three-quarters point. Do not close it completely: the chicks need oxygen from this point onwards.
- To decrease humidity, open the vent fully as in the picture below. Wait until humidity has stabilised and then close the slider to the halfway point.
What about keeping water pots topped up during lockdown?
When I first needed to do this after lockdown in my little Mini Advance incubator I was terrified, because all the advice is not to open the incubator at all after day 18.
But, if there's no other way of topping up the water chambers, how else can we fill them?
I’ve since learned to relax. Opening the lid occasionally for a few seconds to fill the pot won’t affect humidity much. The levels will rise again, although that can take a while.
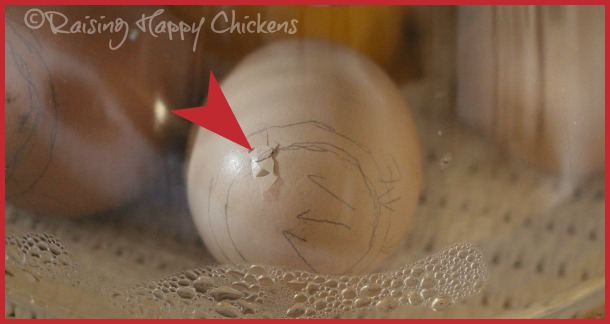
One word of warning though: do avoid opening the lid if any egg has started to ‘pip’ – that is, if you can see even a tiny hole or crack.
A drop in humidity at that point can be fatal, because the internal membrane can dry out in seconds. As it does so, it wraps the chicken too tightly for it to move.
So check the eggs and, should you see a break in the shell like this one, avoid opening the incubator.
What about removing already hatched chicks from the incubator to the brooder?
I have a detailed article about the process of moving chicks from incubator to brooder.
Once you have completed these five steps, you're ready for hatch!
Chicken egg incubator lockdown: where to now?
This article is part of my day-by-day incubation series. To go to the overview and find all the links to every day, use the first button link.
Lockdown happens at day 18 for all but bantam chicken eggs. Use the middle button link to go to day 18 and discover what's happening to the chick, and what can go wrong at this stage.
The third link is to my review of Gail Damerow's excellent book about incubating and hatching chicks. If you love to learn, this is the book to use.
Are you planning to incubate chicken eggs?
These links will take you to pages which are designed specially to help you through the process, from incubation to caring for chicks.
- Home
- Incubation day by day
- Lockdown (day 18)

