Deep litter in the chicken coop: what it is, how it works, and when to use it.
A natural, environmentally friendly way to keep chickens warm, healthy and active in the winter.
If your flock has ever turned a patch of garden into mud, or if you'd like a safe, electricity-free way to keep the coop warmer in cold weather, the deep litter method may be worth considering.
Instead of your flock scratching up your garden, deep litter encourages them to scratch, dig and forage inside, keeping them busy and giving them a warm, evolving floor beneath their feet.
Done well, it can be...
- inexpensive and simple to manage
- a healthy environment for your flock
- a warm, insulated floor for the winter months
- a proven way of enhancing their health and welfare
- a natural way to create nutrient-rich compost.
But it isn't suitable for every coop or climate, and while the benefits are well documented, it only works well when properly managed.
This guide covers what deep litter is, the research behind it, proven pros and cons, and the step-by-step method, and how to decide whether it's right for your own flock.

🪶 Featherlight Takeaways.
Quick insights from this article: especially helpful if you’re looking for the fast essentials.
- Start in autumn so the first layer begins decomposing before the serious cold weather sets in.
- Use a 10–15 cm (4"– 6") base of absorbent, carbon-rich bedding such as wood shavings or hemp.
- Keep the system active: encourage scratching by scattering treats.
- Add thin fresh layers regularly and build up to around 30 cm (12") total depth.
- A healthy deep litter smells earthy, never has an ammonia smell.


The deep litter bedding method: what exactly is it?
The deep litter method is a long-established way of managing coop bedding by allowing it to compost naturally in place, similar to a garden compost heap. It was widely used during World War II to save labour and materials.
Today it's valued for its health benefits, winter warmth, and the excellent compost it produces.
Instead of removing soiled bedding regularly, you build it in layers. The first layer absorbs nitrogen from droppings.
New layers are added on top, and over time the bedding:
- warms as it composts
- develops beneficial microbes
- supports flock immunity
- stays sweet-smelling when well aerated.
The secret isn’t simply the depth. It’s the active layering, airflow, and microbial activity.

Pros of using deep litter in the chicken coop.
When well-managed, deep litter is backed by extensive research and decades of practical experience.
Research-proven benefits:
- Healthy microbial activity reduces harmful bacteria and supports flock immunity, which has been shown to lower mortality rates(1).
- Beneficial microbes can reduce the risk of coccidiosis in both adults and young birds(1).
- Some studies report lower Salmonella levels in deep-litter birds(1).
- Naturally increased levels of Vitamin B(2) and riboflavin(3) support growth and overall health.
Practical advantages:
- Provides gentle, natural warmth in winter without using electricity or heat lamps.
- Reduces labour once established.
- Produces rich, ready-made compost.
- Keeps chickens busy with natural behaviours, especially helpful in bare winter runs.

Cons of deep litter bedding.
Deep litter can be genuinely beneficial, but only when conditions are right.
Not suitable for small coops (very important):
Coops such as these...
- Eglu Cubes
- small wooden coops
- low-roofed houses
- tractor-style coops
...simply don't have enough floor space or depth for the 10–30 cm (4–12") litter needed.
Health risks if mismanaged:
- Ammonia build-up from damp bedding causes respiratory issues.
- Poor drainage or ventilation leads to mould and pathogen growth.
- If microbial balance collapses, immunity benefits disappear.
Environmental and practical limits:
- Doesn't work well in humid climates(4, 5).
- Not suitable for waterfowl (ducks add too much moisture)(4).
- Requires a regular supply of carbon bedding(6).
- Needs active management: it’s not "set and forget"(6).

Where and when to use this method.
Deep litter isn’t a one-size-fits-all system. It works beautifully in the right conditions, and fails quickly in the wrong ones.
So before you begin, check how your coop, climate and flock match up with the requirements.
Deep litter works well if your coop is:
-
Large enough to hold 10–30 cm (4–12") of bedding.
- Well-ventilated with good airflow above roost height.
- Dry: no leaks, damp patches or pools of water.
- Shaded in summer and protected in winter, so bedding stays relatively stable.
Your climate should be:
- Cool or cold in winter: deep litter provides gentle natural warmth.
- Not excessively humid: the system needs some moisture, but not constant damp.
And your flock:
- Has access to the coop long enough to scratch and turn the bedding.
- Doesn't include waterfowl (ducks add too much moisture).
- Contains enough chickens to keep the litter active (too few chickens means too little turning).
Avoid this method if:
- Your coop is small or low-roofed
- You live in a humid climate
- Your flock spends most of the day outdoors
- You cannot source enough carbon-rich material.
Best time to start:
- Early autumn is ideal, with enough time for the base layer to begin composting before winter.
- Winter works too, but the bedding will take longer to warm.
- Summer is not ideal unless you're prepared to aerate manually.

Quick start: how to begin.
A fast overview before the detailed instructions.
1. Start with a clean floor.
Remove old bedding completely unless you've used deep litter before. In that case, leave a thin layer to jump start the microbes.
2. Create a healthy base.
- Earth floors: ideal.
- Concrete or plastic floors: add about 2.5 cm (1") of compost or soil.
- Wooden floors: protect carefully from moisture.
3. Add the first carbon-rich layer.
- 10–15 cm (4–6") of dry, carbon-rich bedding such as wood shavings or hemp..
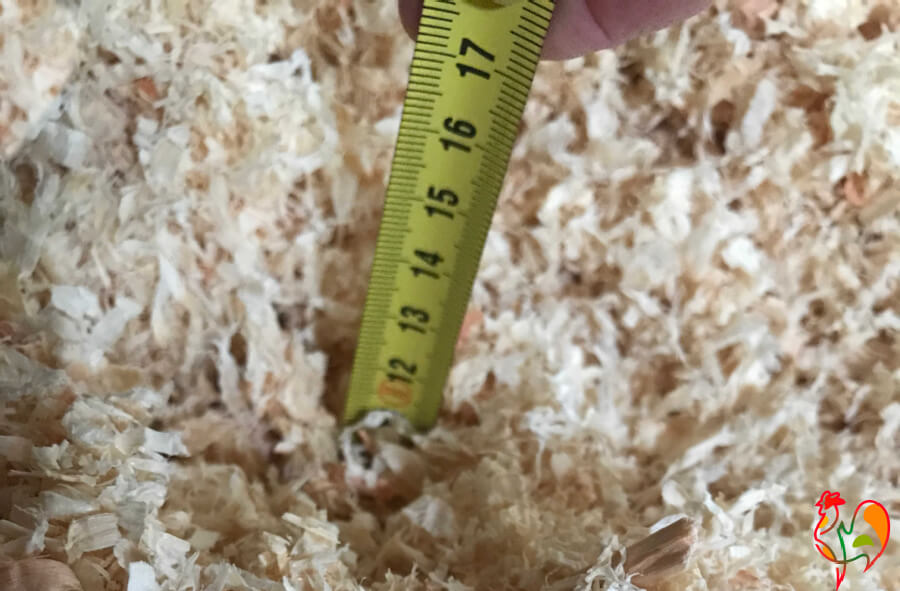 I use wood shavings at 10cm (4").
4. Encourage scratching.
- Encourage scratching by scattering a small handful of grain, dried mealworms or sunflower seeds.
5. Add new layers regularly.
- Add thin, frequent top-ups with carbon material.
6. Monitor moisture and airflow.
- Bedding should never smell of ammonia.
7. Build gradually to 30 cm (12").
8. Compost the removed material.
Note: Deep litter can work in a covered run, but not in an exposed run.

The detailed method. Step 1: how to start.
Begin by clearing out existing bedding, especially if you've been using:
- sand (not absorbent enough)
- straw (poor absorbency)
On concrete floors, add about 2.5 cm (1") of compost to create the microbial foundation needed.
Begin by clearing out your existing bedding, particularly if you've used sand which does not work well with deep litter, or straw which is not absorbent enough at the start.
If you have a concrete floor, put down a layer of potting or garden compost before you start. You'll need about 2.5 centimetres (1"). This provides the earth base necessary for both absorption and microbe activity.

Step 2: the first layer.
(Links in this section are "affiliate links", which means that if you click and buy something, I earn a small commission at no extra cost to you)
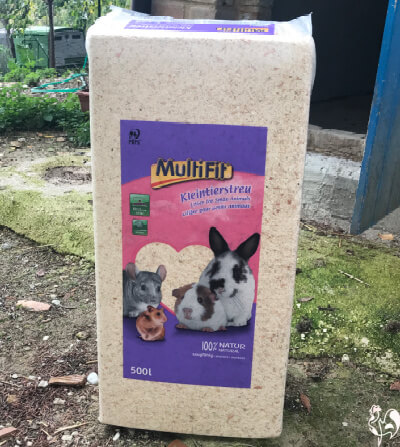 My wood shavings waiting to be laid.
The first layer is the foundation of the whole system.
It needs to be dry, carbon-rich, absorbent, and fine enough to begin breaking down steadily.
Avoid materials like straw and grass which is not absorbent and more likely to become wet and mouldy.
The best choice: wood shavings.
This is what I use in my own coop.
- Fine enough to compost well.
- Highly absorbent.
- Comfortable underfoot.
- Proven to support beneficial microbial growth.
- Easy and inexpensive to source in large quantities.
Choose untreated, unscented shavings from a good-quality brand. Cheaper brands often contain too much dust, which isn't healthy for you or your flock.
Something like this is ideal.
I use about 1.5 x 500 litre bags for a coop which is about 3 metres x 2 metres (9' by 6'). It's an expensive initial outlay, but it will be the only one you'll need for at least several months.
Hemp bedding is an excellent alternative, and said to be more absorbent.
Avoid straw-only bedding or long grass. Both trap moisture and can go mouldy before the system establishes.
Depth.
- Spread the bedding to 10–15 cm (4–6") depth.
- This gives the first layer enough depth to mix with droppings, begin composting, and encourage your flock to scratch.
- If your coop loses bedding through the door, a simple wooden board makes an excellent barrier. Mine is 15 cm (6") high, and also acts as a handy depth marker.
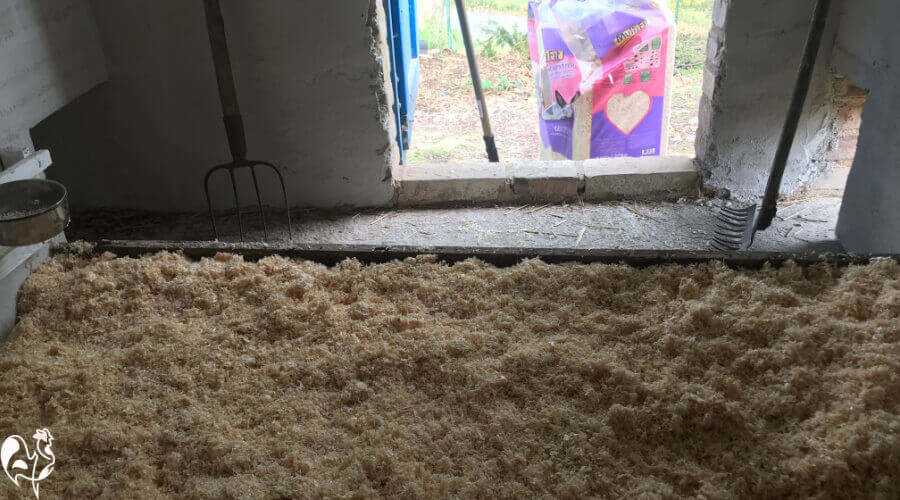 The pristine initial deep litter layer in the roosting part of my coop.
After laying the bedding...
- Rake to level it.
- Sprinkle a handful of mealworms, grain or sunflower seeds to encourage your flock to turn the bedding naturally.
Over the next few days, check:
- It's staying dry.
- Your flock is scratching through it.
- No damp compacted patches are forming. If you see clumps, just break them up and mix them back in.

Step 3: add new layers.
Deep litter works best when thin layers are added often, not thick layers occasionally.
How often to add fresh bedding.
- About 1–2 cm (½–1") every few days.
- Add more immediately if bedding looks compacted or slightly damp.
- In winter you may need to top up more frequently; in summer, less.
The goal is simply to keep the surface dry, light and easy to scratch through.
Good materials for topping up.
These are the best options for the upper layers. Most are free or easy to source:
- dried leaves
- chopped straw (not too much: it's not absorbent enough)
- dry grass clippings (thin layers only)
- pine needles
- chipped bark
- chipped bamboo.
Keep additions light. These layers feed the microbes and help maintain airflow.
Using bamboo as deep litter bedding.
🐥 A note from my flock: here in rural Italy, many families (including mine) grow a small patch of bamboo for garden use, and I've found it's perfect for deep litter.
- It grows quickly, provides shade in summer and a windbreak in winter, and sheds leaves throughout the year.
- I shred the canes through a small chipper, mix the leaves and chips into the bedding, and it breaks down beautifully.
- Best of all, it's free and sustainable!
My flock always rush in to investigate when a fresh layer goes down!
 Bamboo: shelter, windbreak and bedding in one plant!
Important: do not use Diatomaceous Earth.
Diatomaceous Earth has its place, especially in outdoor dust baths, but in a deep litter system it kills the exact microorganisms you are trying to encourage.
Using DE in deep litter will stop the system developing and strip away all the benefits.

Step 4: how to keep managing it.
Once established, maintenance is simple but needs to be consistent. The goal is to keep the bedding dry on top, active underneath, and always well-aerated.
1. Control moisture.
A well-working deep litter system contains some moisture but never feels wet or sticky, and never smells of ammonia.
To prevent excess moisture:
- Keep waterers outside the coop.
- Check ventilation regularly: you should feel a gentle airflow above roost height, without draughts on the chickens.
- Break up any clumps and mix them through the bedding.
- Add a thin layer of dry carbon material if the surface looks damp.
How to tell if the litter is too wet:
- Take a handful and squeeze.
- No water should drip out.
- It should crumble when released, not clump.
- Any smell of ammonia means the system is struggling. Resolve it immediately or restart if needed.
2. Keep the bedding aerated.
Your flock will do most of the aeration work, but you'll need to help...
- if your chickens spend long days outside and aren't turning the bedding enough
- if the flock is small for the coop size
- if parts of the bedding start to matt or turn pale
- Simply rake gently, break up clumps, and fluff the surface. This restores airflow and helps microbes thrive.
3. Be patient in allowing build-up.
Deep litter needs time to develop into a warm, microbe-rich compost system. It may take several months to reach the ideal depth of around 30 cm (12").
Once reached:
- remove only small amounts from the very bottom
- add fresh bedding on top
- never empty the whole coop at once: that resets the microbial community.
This slow-and-steady approach keeps the system healthy and makes your coop more stable through winter.

Is the deep litter method right for you?
Like most things in chicken keeping, deep litter is not universal.
It depends on:
- your coop size and airflow
- your climate
- your birds’ habits
- your patience
If your setup fits the requirements, deep litter can be one of the most natural, sustainable ways to support your flock through winter.
Take what works for you.
Your chickens will soon tell you if they approve.
My flock loves deep litter in winter. They scratch, forage and chatter through the layers as though unwrapping a present, and I know they're warm, active and breathing healthy air.
The bedding I use takes some unpacking, and is always helped by my chickens!
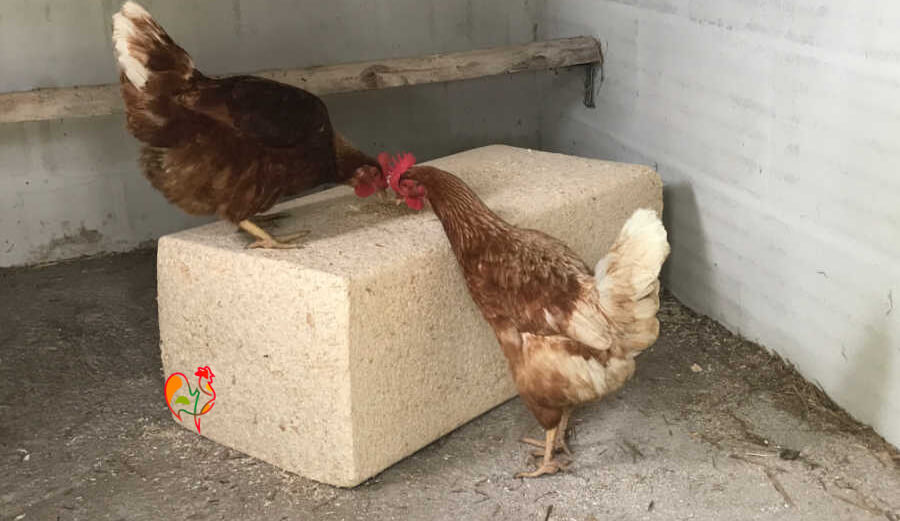 This bedding takes some unpacking - helped by chickens!
But like most things in chicken keeping, deep litter isn't a universal answer.
It comes down to:
- your coop (the space, the ventilation, the flooring)
- your climate (cool and dry works best)
- your birds (some flocks work the system beautifully, others ignore it!)
- your patience (a little attention early on pays off later)
If the idea appeals, and your setup matches the requirements, then deep litter can be one of the most natural, sustainable ways to support your flock through winter.
As always, take what works for you. Your chickens will soon tell you if they approve.

Frequently asked questions about deep litter in the chicken coop.
Can you use the deep litter method in any chicken coop?
Can you use the deep litter method in any chicken coop?
No.
Deep litter needs enough floor space and height to build a 10–30 cm (4–12") bedding layer, plus good airflow above roost level.
It works well in walk-in coops and sheds, but small houses (like the Eglu Cube) don't have enough space for the system to function properly.
Does deep litter smell?
Does deep litter smell?
A healthy deep litter system smells earthy, like a woodland floor.
If you detect any sharp, ammonia-like odour, the bedding is too wet or compacted, and the system needs immediate attention.
With good ventilation and regular topping up, smell shouldn't be an issue.
Does deep litter attract rats?
Does deep litter attract rats?
No more than any other bedding, as long as feed is secured and the bedding is regularly scratched through.
See my article for more about what does attract rats.
Can you use diatomaceous earth (DE) in deep litter?
Can you use diatomaceous earth (DE) in deep litter?
No. DE kills the beneficial microbes the system relies on.
How often should you clean a deep litter coop?
How often should you clean a deep litter coop?
Don't remove everything at once.
Instead, take out small amounts from the bottom only when it has fully composted, and top up the surface regularly with fresh carbon-rich bedding.
A full clean-out happens just once or twice a year, depending on climate and flock size.

More articles about coops.

Sources.
A lot of "facts" you'll find on the internet are often people's individual views, based on inaccurate information repeated from poor quality sources.
The information I provide in this article and others is based not just on my own experience, but on evidenced facts from scientific, peer-reviewed research and books from highly respected and experienced poultry keepers such as Gail Damerow.
Some of the trusted sources I have used in this article are these.
1. Kennard, D. C. et al: The Compost (Built Up) Litter in Chicken Houses. Pub. Ohio Agricultural Experiment Station, 1959.
2. Sogunle, O, et al: Free range and deep litter poultry production systems: effect on performance, carcass yield and meat composition of cockerel chickens. Pub. Journal of Tropical Animal Health and Production, 2021.
3. The deep litter system of poultry farming. Pub. Journal of Poultry Science, 2020.
4. Oluyemi, J. A, and Roberts, Y. O: The Cage Versus the Deep Litter System for the Management of Layers in the Humid Tropics. Pub. Journal of Poultry Science, 1975.
5. Li, Hui: Design of Moisture Control System for Beddings of Deep Litter. Pub. Journal of Agricultural Science and Technology, 2014.
6. Thiele, H-H, and Pottgüter, R: Management Recommendations for Laying Hens in Deep Litter, Perchery and Free Range Systems. Pub. Lohmann Tierzucht, 2008.
